


Owning a car comes with its fair share of responsibilities, and one of them is maintaining its exterior appearance. Over time, minor scratches and blemishes can accumulate, detracting from the vehicle’s overall look. Fortunately, you don’t need to visit a professional auto shop to address these imperfections. With a little time and the right tools, you can successfully execute a touch-up right in your garage.
Touching up car paint is a straightforward process that empowers car owners to restore their vehicle’s finish without incurring significant costs. Whether it’s a minor scratch from a shopping cart or a deeper scrape from an unwanted brush with a branch, knowing how to properly apply touch-up paint can make a substantial difference. This guide will walk you through the essentials of touching up your car’s paint job, ensuring a seamless and polished result.
Before diving into the steps, it’s crucial to gather all necessary materials, including touch-up paint that matches your car’s color, sandpaper, and clear coat. By preparing adequately, you will enhance your chances of achieving a professional-looking repair. Understanding the importance of each stage in the process can transform what might seem like a daunting task into an easy DIY project, bringing your vehicle back to its former glory.
Choosing the Right Touch-Up Paint for Your Vehicle
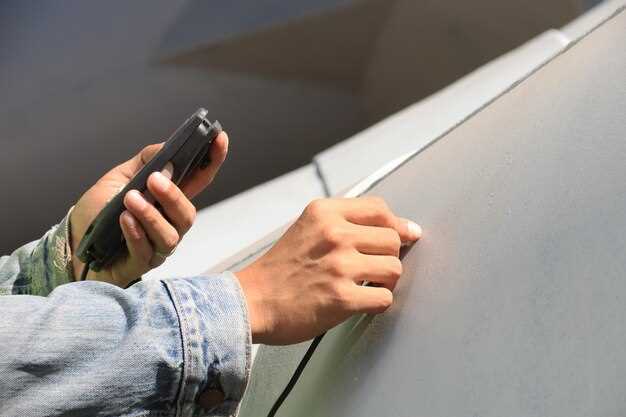
Selecting the appropriate touch-up paint for your vehicle is crucial for effectively addressing scratches and blemishes. To start, it’s essential to know your car’s paint color code, which can usually be found in the owner’s manual or on a label inside the driver’s door. This code will guide you in finding an exact match for your vehicle’s color.
When searching for touch-up paint, consider whether you need paint for minor scratches or larger areas. Many manufacturers offer pens or bottles specifically designed for touch-up jobs. Pens are ideal for small scratches as they provide precision application, while bottles may be better suited for larger areas that require more extensive coverage.
Additionally, evaluate the paint types available in the market, including acrylic, enamel, and urethane. Acrylic paints dry quickly and are user-friendly, whereas enamel paints are well-known for their durability. Urethane paints offer excellent finish quality and resistance but often require more expertise for application. Choose based on your skill level and the extent of touch-up required.
Finally, it’s advisable to read reviews or seek recommendations from other car owners. A well-reviewed touch-up paint can save time and ensure effective coverage, making the repair process seamless. Investing in quality touch-up paint will not only enhance your vehicle’s appearance but also protect against further damage.
Step-by-Step Guide to Preparing Scratched Areas
Before applying touch-up paint to your vehicle, it is essential to properly prepare the scratched areas to ensure a smooth and long-lasting finish. Follow these detailed steps to get started.
First, thoroughly clean the scratched area. Use a mild soap and water solution to remove dirt and grime. Once cleaned, dry the area completely with a lint-free cloth to prevent moisture interference with the paint application.
Next, assess the depth of the scratches. For superficial scratches, you may only need to lightly sand the area. Use fine-grit sandpaper (around 2000 grit) to gently sand over the scratch until the surface feels smooth. If the scratch is deeper, you may need to sand a larger area to ensure proper adhesion of the touch-up paint.
After sanding, clean the area again to remove any dust or debris created during the sanding process. You can use a clean cloth and rubbing alcohol to ensure the surface is contaminant-free.
Once the area is cleaned and prepped, apply a primer if the scratch has penetrated down to the metal. Select a primer that is compatible with your vehicle’s paint type. Apply it sparingly and allow it to dry according to the manufacturer’s instructions before proceeding.
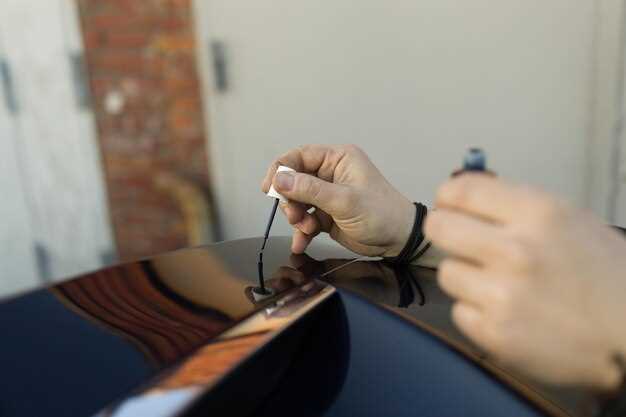
Finally, carefully apply the touch-up paint to the prepared area. Use a fine brush or applicator to ensure precise application. Make sure to apply thin layers, allowing each coat to dry before adding another. This technique will help achieve a seamless repair.
Applying Touch-Up Paint: Tips for a Smooth Finish
When dealing with scratches on your car’s surface, applying touch-up paint can restore its appearance and protect the underlying material. To achieve a smooth finish, preparation is essential. Start by thoroughly cleaning the area around the scratch with soap and water to remove any dirt or debris. Dry the surface completely before proceeding.
Next, sand the scratched area lightly with fine-grit sandpaper. This step helps create a smooth and even surface for the paint to adhere to. Be sure to only sand the affected area to avoid damaging the surrounding paint. After sanding, wipe the area with a clean, lint-free cloth to remove any dust particles.
Before applying the touch-up paint, shake the paint bottle well. Use a small brush or a specialized applicator to apply the paint directly to the scratch. Start by using a thin layer, as it’s easier to gradually build up the color rather than attempting to remove excess paint later. Apply the paint in long, even strokes and allow it to dry for the recommended time on the product label.
If the scratch remains visible after the first coat, don’t be discouraged. Apply additional layers, allowing adequate drying time between applications. Once the final coat is dry, lightly polish the area with a soft cloth to blend it with the surrounding paint. This step enhances the gloss and ensures a seamless finish. Finally, consider applying a clear coat to protect the touch-up paint and add extra durability.


