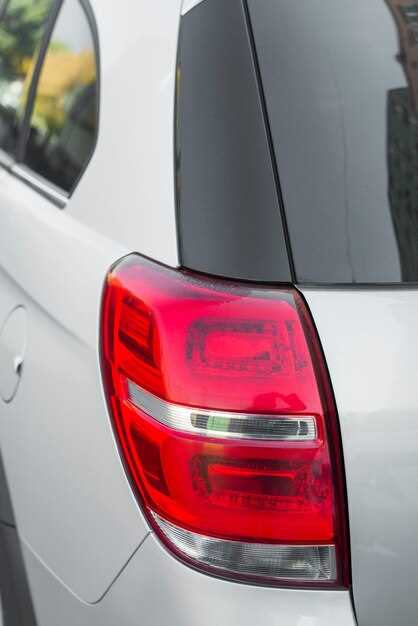
Replacing tail lights is an essential maintenance task that every vehicle owner should be familiar with. Tail lights play a crucial role in ensuring road safety by signaling your intentions to other drivers. When a tail light goes out, it is not just a minor inconvenience but can lead to potential hazards on the road. Therefore, knowing how to replace these lights promptly is important.
The process of replacing tail lights can seem daunting, especially for those who are not mechanically inclined. However, with the right tools and guidance, it can be a straightforward task. This guide will take you through a systematic approach to help you safely and effectively replace your tail lights. Each step is designed to provide clarity and ease, ensuring that you can navigate this repair without unnecessary stress.
By the end of this guide, you will have the knowledge and confidence to tackle a tail light replacement, enhancing your vehicle’s safety and visibility. Let’s get started with the necessary tools and the steps required to replace your tail lights efficiently.
Gathering Necessary Tools and Materials for Tail Light Replacement

Replacing tail lights requires a few essential tools and materials to ensure a successful and safe installation. Start by gathering the necessary items before you begin the process.
First, you will need a basic set of hand tools, including a screwdriver (either flathead or Phillips, depending on your vehicle’s specific requirements) and a socket set. These will be essential for removing the screws and bolts that hold the tail light assembly in place.
A wrench might also be necessary if your vehicle uses nuts to secure the tail light housing. Check your vehicle’s manual for specific fastener types used in the tail light installation.
Next, you’ll require a replacement bulb or a complete tail light assembly. Ensure you purchase the correct part that matches the make and model of your vehicle. You can typically find this information in the owner’s manual or on the existing tail light unit.
In addition to tools and replacement parts, it is a good idea to have a pair of gloves and a clean cloth. Gloves will protect your hands from sharp edges and hot components, while the cloth can be used to clean any dirt or debris from the area surrounding the tail light.
Lastly, consider using a multimeter to check for electrical issues if you experience problems with the tail lights not functioning correctly. This tool will help diagnose whether the issue is with the wiring, the connector, or the bulb itself.
Having these tools and materials at the ready will streamline the process of replacing your tail lights and ensure you are well-prepared for the task ahead.
Step-by-Step Instructions for Removing and Installing Tail Lights
To begin the process of replacing tail lights, ensure that your vehicle is parked on a flat surface and the engine is turned off. Gather the necessary tools, including a flathead screwdriver, Phillips screwdriver, and possibly a socket wrench, depending on your vehicle model.
Start by opening the trunk or rear hatch of your car. Locate the access panel or cover for the tail light assembly. In many vehicles, this will be directly behind the tail light. If necessary, use the flathead screwdriver to gently pry off any plastic clips or panels that may be covering the tail light assembly.
Once you have access to the tail light, identify the screws or bolts holding the assembly in place. Use a Phillips screwdriver or socket wrench to remove these fasteners. Carefully pull the tail light assembly away from the vehicle. Be cautious, as some small clips may still be holding it in place.
Disconnect the electrical connector by pressing the release tab and gently pulling it apart. Ensure that you do not pull on the wires directly, as this can cause damage.
Now that the old tail light is removed, take the new tail light and connect it to the electrical harness. Make sure the connection is secure before proceeding.
Align the new tail light assembly with the mounting holes on the vehicle. Carefully push it into place, ensuring that any clips snap back into position. Replace the screws or bolts you previously removed to secure the assembly.
Before closing the access panel, test the new tail light by turning on your vehicle’s ignition and activating the lights. Ensure that the new tail light operates correctly.
After confirming functionality, close the access panel or cover. If any clips or screws were removed, make sure to reattach them to ensure everything is secure.
Finally, clean up any tools used during the process and close your trunk or hatch. Your tail light has now been successfully replaced.
Testing New Tail Lights for Proper Functionality

After you replace the tail lights, it’s essential to test them to ensure they are functioning correctly. Begin by turning on the vehicle and activating the headlights. This will allow you to check if the tail lights illuminate as expected.
Next, have someone assist you by watching the tail lights while you activate the brake pedal. This test will confirm that the brake lights are working and that they shine brighter than the standard tail lights. If one or both lights do not illuminate, check the connections and ensure they are securely attached.
Additionally, you should test the turn signals. Activate the left and right turn signals individually and observe if the corresponding tail lights flash. This step ensures the lights are not only operational but also correctly wired for signaling purposes.
Finally, if your vehicle is equipped with a reverse light, engage the reverse gear and check if the tail lights illuminate accordingly. This is crucial for safety when backing up. If any of the lights do not function during these tests, revisit your installation and check for any issues that may require a re-evaluation of the components used in the replacement process.
By following these steps, you can ensure that your new tail lights are installed correctly and are fully operational, contributing to your vehicle’s safety on the road.


