


Keeping your engine properly lubricated is essential for optimal performance and longevity. One of the simplest yet most crucial maintenance tasks you can perform is to regularly check your engine oil level. This process not only ensures that your engine is adequately protected but also helps prevent potential issues that can arise from low oil levels.
Understanding how to check your engine oil level is vital for every vehicle owner. Engaging in this routine maintenance task can save you from costly repairs and enhance your vehicle’s efficiency. In this article, we will guide you through the steps necessary for accurately assessing your engine oil level, as well as highlight the signs that might indicate a problem with your oil.
By following these straightforward instructions, you can ensure that your engine maintains the right balance of lubrication, promoting both performance and reliability. Let’s delve into the specifics of checking your engine oil level and understand why this task is a fundamental aspect of car care.
Understanding the Importance of Engine Oil Level
The engine oil serves a critical function in maintaining the health and efficiency of your vehicle’s engine. It acts as a lubricant, reducing friction between moving parts and preventing wear and tear. A proper oil level ensures that the engine operates smoothly and efficiently, which directly impacts overall performance and fuel economy.
Insufficient oil levels can lead to severe engine problems, including overheating and potential engine failure. When the oil level is too low, it cannot adequately lubricate the engine components, leading to increased friction and heat. This scenario can cause irreversible damage and result in expensive repairs.
Frequent monitoring of the engine oil level is essential to avoid such issues. It allows vehicle owners to detect potential leaks or excessive consumption of oil early on, facilitating timely interventions. Regular checks also ensure that the oil remains clean and effective, as dirty oil can lose its lubricating properties and contribute to engine damage.
In summary, maintaining the correct engine oil level is vital for engine longevity, performance, and overall vehicle reliability. Ensuring that you frequently check and maintain the right amount of oil can save you from costly repairs and enhance your vehicle’s lifespan.
Step-by-Step Guide to Checking Oil Level Accurately
To ensure your engine runs smoothly, it’s essential to routinely check the oil level. Follow these straightforward steps for an accurate assessment.
1. Preparation: Park your vehicle on a level surface to obtain an accurate reading. Turn off the engine and wait for about 10 minutes to allow the oil to settle.
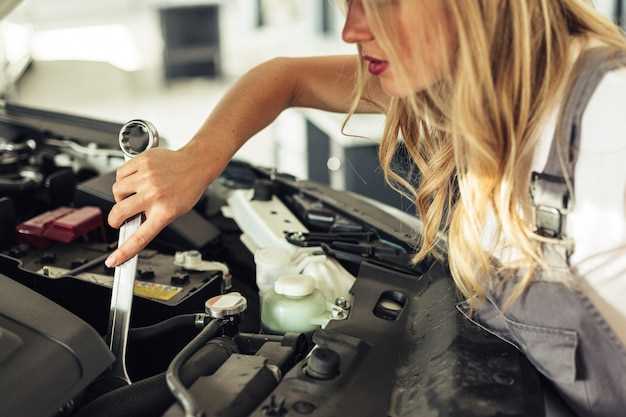
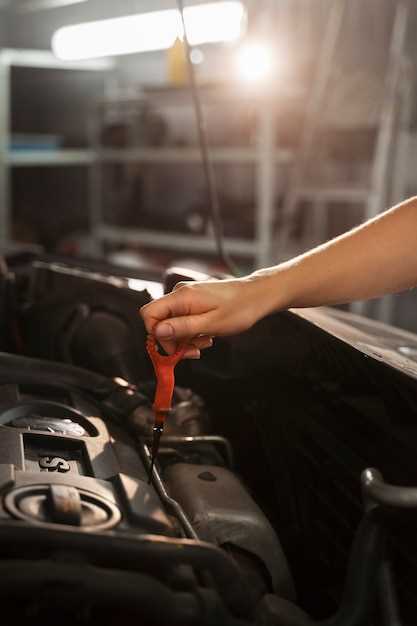
2. Locate the Dipstick: Identify the engine oil dipstick, which is usually marked with a bright handle. Pull the dipstick out carefully.
3. Clean the Dipstick: Wipe the dipstick with a clean, lint-free cloth to remove any oil residue. This will help provide a clear reading when you reinsert it.
4. Reinsert the Dipstick: Insert the dipstick back into its tube completely. Make sure it is fully seated to avoid an inaccurate reading.
5. Check the Oil Level: Remove the dipstick once again and observe the oil level on the marked indicators. Most dipsticks have two marks that signify ‘low’ and ‘full’ levels.
6. Assess Oil Condition: In addition to the level, examine the oil’s texture and color. Healthy oil should be amber and clear, while dark or gritty oil may indicate contamination.
7. Add Oil if Necessary: If the oil level is below the ‘low’ mark, it’s time to add oil. Use the appropriate type of engine oil recommended in your owner’s manual. Pour it in gradually and recheck the level to avoid overfilling.
8. Secure the Dipstick: Once you have completed the check and added oil if necessary, return the dipstick to its original position and ensure it is properly secured.
Regularly checking your engine oil level is crucial for optimal engine performance and longevity. By following these steps, you can effectively maintain your vehicle’s engine health.
Common Mistakes to Avoid When Checking Engine Oil
One of the most common mistakes is checking the oil level immediately after turning off the engine. The oil needs time to settle in the oil pan, so wait at least 10 minutes before checking. This ensures an accurate reading.
Another mistake is not using the dipstick correctly. Make sure to pull the dipstick out fully, wipe it clean with a cloth, and then reinsert it completely before checking the level again. This technique prevents erroneous readings caused by oil residue left on the dipstick.
Failing to park the vehicle on a level surface can also lead to misjudgment of the oil level. When the car is on an incline, the oil may gather towards one side, giving a false indication of the true oil level.
Some individuals overlook the importance of checking the oil’s condition alongside its level. Oil should be smooth and not gritty; if it appears dark and dirty or if there are metal particles, this indicates contamination or engine wear.
Lastly, people often neglect the proper maintenance schedule for oil changes. Even if oil levels are fine, old or degraded oil can impact engine performance negatively. Follow manufacturer recommendations for oil change intervals to ensure optimal engine health.


