


Changing spark plugs is a fundamental maintenance task that every car owner should know how to perform. Spark plugs play a crucial role in the engine’s performance, igniting the air-fuel mixture and ensuring efficient operation. Over time, these essential components can wear out, leading to decreased fuel efficiency, rough idling, and even engine misfires.
In this guide, we will provide a detailed, step-by-step approach to replacing your spark plugs at home. Armed with the right tools and knowledge, you can save money on costly repair bills while enhancing your vehicle’s performance. Whether you’re a seasoned DIY enthusiast or a beginner looking to learn, this guide will walk you through the entire process of changing spark plugs, from gathering tools to completing the installation.
By following these steps, you will not only improve your understanding of your vehicle’s engine but also gain valuable hands-on experience. Let’s delve into the essentials of spark plug replacement and get your engine running smoother than ever!
Choosing the Right Spark Plugs for Your Vehicle
When it comes to maintaining your vehicle, selecting the appropriate spark plugs is crucial for optimal engine performance. Spark plugs are essential components that ignite the air-fuel mixture, enabling combustion. Choosing the right plugs can enhance fuel efficiency, reduce emissions, and extend engine life.
First, consult your vehicle’s owner manual to determine the manufacturer’s specifications for spark plugs. This document usually provides information on the type, size, and heat range required for your specific engine. It is essential to match these specifications to avoid issues such as misfiring or poor fuel economy.
Next, consider the type of spark plugs available. There are several varieties, including copper, platinum, and iridium plugs. Copper spark plugs offer excellent conductivity but have a shorter lifespan compared to their platinum and iridium counterparts. Platinum plugs are more durable and suitable for everyday use, while iridium plugs offer the best performance and longevity, making them ideal for high-performance or turbocharged engines.
Another important factor is the heat range of the spark plugs. A plug with the correct heat range can efficiently dissipate heat to prevent pre-ignition or fouling. If you frequently drive under extreme conditions, you might benefit from cooler heat range plugs, whereas standard driving conditions generally require plugs within the manufacturer’s recommended range.
Lastly, consider the brand reputation and quality. Trusted brands often invest in research and development to produce reliable spark plugs that meet or exceed industry standards. Investing in high-quality plugs can lead to long-term benefits for your vehicle’s performance and maintenance.
Tools and Materials Needed for Spark Plug Replacement
To successfully replace spark plugs at home, having the right tools and materials is essential. Here’s a detailed list of what you’ll need for this DIY task.
1. Spark Plug Socket: A specialized socket is designed specifically for spark plugs, usually with a rubber insert to grip the plug. This tool is crucial for safely removing and installing plugs without damaging them.
2. Ratchet Wrench: A ratchet wrench will enable you to apply the necessary torque when loosening or tightening the spark plugs. Make sure it is compatible with the spark plug socket you are using.
3. Torque Wrench: To ensure your new plugs are tightened to the manufacturer’s specifications, a torque wrench is important. This will help avoid over-tightening, which can damage the plugs or engine.
4. Gap Tool: Before installation, it’s essential to check and adjust the spark plug gap. A gap tool or feeler gauge will help you measure the gap accurately, ensuring optimal engine performance.
5. Anti-seize Compound: To prevent the spark plugs from seizing in the cylinder head over time, applying a non-metal anti-seize compound to the threads is recommended. This facilitates easier future removal.
6. Dielectric Grease: Applying dielectric grease on the spark plug boots can help prevent moisture ingress and improve electrical connectivity. This is particularly important in humid environments.
7. Pliers: Pliers may be necessary for managing any stubborn boots or wires that are difficult to remove or reattach during the replacement process.
8. Cleaning Brush: A cleaning brush is used to remove any debris from the spark plug holes before installation. Keeping the area clean helps prevent any particles from entering the combustion chamber.
9. Gloves and Safety Glasses: Always wear gloves to protect your hands from dirt and grease while working. Safety glasses will shield your eyes from small debris that may fall when working under the hood.
With these tools and materials at hand, you will be well-equipped to tackle the spark plug replacement process confidently and efficiently.
Step-by-Step Process: Removing Old Spark Plugs and Installing New Ones
Begin by ensuring your vehicle is parked on a flat surface and the engine is cool to avoid burns. Gather necessary tools: a spark plug wrench, a ratchet, and a torque wrench.
Next, disconnect the negative battery terminal to prevent electrical shocks while working on the ignition system. This step is essential for safety.
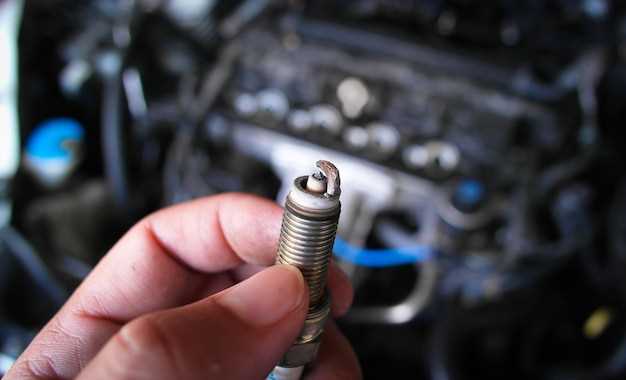
Locate the spark plugs by referring to your vehicle’s manual. They are usually found on the top or side of the engine. Remove any plastic covers or components blocking access to the spark plugs.
Using the spark plug wrench, loosen and carefully unscrew the old spark plugs. Turn counterclockwise, being cautious not to damage the surrounding components. Once loose, you can remove them by hand.
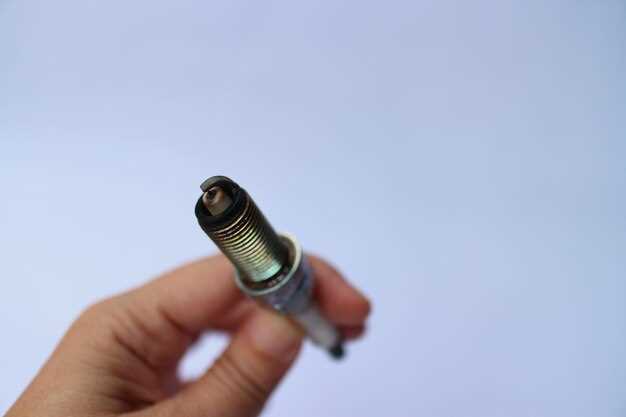
Inspect the old spark plugs for signs of wear or damage, such as excessive carbon buildup or wear on the electrodes. This information can provide insight into engine performance.
Before installing new spark plugs, check the gap specification using a feeler gauge. Adjust the gap if necessary to ensure optimal performance.
Apply a small amount of anti-seize compound to the threads of the new spark plugs to facilitate easier removal in the future. Thread the new plugs into their respective holes by hand, ensuring they align correctly.
Using the torque wrench, tighten the new spark plugs to the manufacturer’s specified torque settings. This step is crucial to prevent over-tightening and potential damage.
Reconnect any components or covers previously removed, ensuring everything is secured properly. Finally, reconnect the negative battery terminal.
Start your engine and listen for any irregular sounds. A smooth operation indicates a successful installation of the new spark plugs.


