


Experiencing a flat tire can be a frustrating and unexpected situation for any driver. Whether you are on a busy highway or parked in your driveway, knowing how to handle a flat tire is crucial for maintaining your mobility and safety. This guide will walk you through the essential steps to efficiently fix a flat tire, empowering you with the skills needed to tackle this common issue.
A flat tire typically occurs due to punctures, leaks, or other damages that compromise the tire’s integrity. Understanding the key indicators of a flat tire, such as a noticeable drop in air pressure or difficulty steering, is the first step in addressing the problem. This article will provide you with a comprehensive approach to diagnosing and fixing a flat tire, ensuring that you are well-prepared for any roadside emergencies.
Throughout this guide, you will discover the necessary tools and techniques required for a successful repair. From safely lifting your vehicle to securely replacing the tire, each step will be outlined clearly to help you gain confidence in your abilities. By the end of this guide, you will be equipped to handle a flat tire situation with ease, allowing you to get back on the road without unnecessary delays.
Identifying the Cause of the Flat Tire

Before you can repair a flat tire effectively, it is crucial to identify its cause. This step ensures that you not only fix the immediate issue but also prevent future occurrences.
Start by visually inspecting the tire for any obvious damage. Look for objects such as nails, screws, or shards of glass that may have pierced the rubber. If you find something lodged in the tire, do not remove it yet, as it can allow air to escape rapidly.
Next, check the sidewalls and tread for any signs of wear or cracks. Uneven tire wear can indicate misalignment or improper inflation, contributing to premature tire failure. Take note of any bulges or blisters, as these are indicators of internal damage.
Another common cause of flat tires is under-inflation. Use a pressure gauge to measure the tire pressure against the manufacturer’s recommended levels. If the tire is significantly under-inflated, it may lead to overheating and eventual blowout.
In addition, examine the valve stem, which can sometimes leak air. Apply soapy water to the valve stem; if bubbles form, there is a leak that needs to be addressed.
Finally, consider the age of the tire. Tires have a limited lifespan, typically around six years, and their structural integrity can degrade over time, leading to flats without visible external damage.
By thoroughly assessing these factors, you can effectively identify the cause of your flat tire and determine the necessary steps for a successful repair.
Tools and Materials Needed for the Repair
To effectively repair a flat tire, it is essential to gather the necessary tools and materials beforehand. This ensures a smooth and efficient process when addressing the issue.
First, you will need a tire jack to lift the vehicle safely. A sturdy jack will allow you to access the flat tire without difficulty. Next, a lug wrench is crucial for removing the lug nuts holding the tire in place. Make sure the wrench fits your vehicle’s specific lug nut size.
A tire repair kit is another vital component. This kit typically includes tire plugs or patches, rubber cement, and a insertion tool. These items will help you seal the puncture securely. Additionally, a pair of pliers can be useful for removing any debris or foreign objects lodged in the tire.
It is also advisable to have an air compressor or tire inflator on hand. Once the repair is made, you will need to re-inflate the tire to the recommended pressure. A tire pressure gauge is important for checking the tire’s pressure after inflation, ensuring it is safe for driving.
Lastly, gloves are recommended to keep your hands clean and protected during the repair process. Having all these tools and materials prepared will facilitate a successful flat tire repair, allowing you to get back on the road quickly and safely.
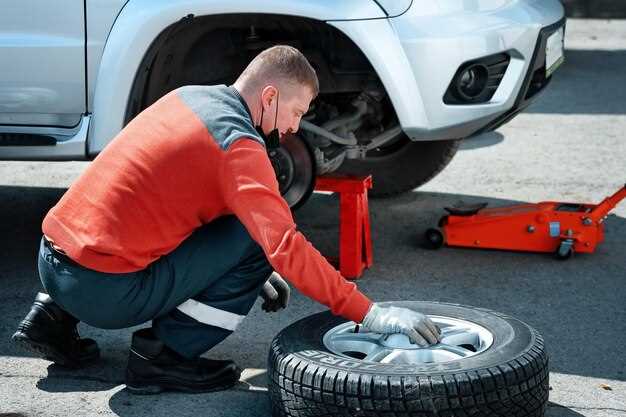
Executing the Tire Repair Process Safely
Before beginning the tire repair process, ensure you have the necessary tools at hand, including a jack, lug wrench, and tire repair kit. Always choose a well-lit, flat area where you can work without distractions or hazards.
Start by engaging your vehicle’s parking brake to prevent any unexpected movement. It is also advisable to place wheel chocks behind the tires that remain on the ground for added stability.
When lifting the vehicle with a jack, position it under the recommended jacking point specified in your vehicle’s manual. Never place any part of your body underneath the vehicle while it is elevated. Always use jack stands for additional safety once the tire is off the ground.
After removing the flat tire, inspect it carefully for the cause of the puncture. If the damage is repairable, use the tire repair kit following the manufacturer’s instructions. Ensure that the tire sealant is evenly applied and allowed to set according to the product guidelines.
When tightening the lug nuts on the repaired tire, follow a star pattern to ensure an even fit. Replace the flat tire securely and lower the vehicle slowly while double-checking for any instability or issues.
Finally, check the air pressure of the repaired tire to ensure it meets the recommended specifications. It’s essential to drive cautiously for the first few miles post-repair to assess the stability of the tire.


