


Inspecting brake pads is an essential part of vehicle maintenance that every car owner should consider doing at home to ensure safety and performance. Regular checks on these vital components can help you identify wear and tear before it leads to more significant issues. Whether you are a seasoned DIY enthusiast or a novice, knowing how to check your brake pads can save you both time and money.
Before diving into the inspection process, it’s important to understand what brake pads do. These components are responsible for generating the friction necessary to slow down or stop your vehicle. Over time, brake pads wear down and can become less effective, which can jeopardize your safety on the road. Therefore, learning how to inspect your brake pads safely is crucial for maintaining optimal braking performance.
In this article, we will guide you through the steps involved in safely checking your brake pads at home. By following a few simple DIY methods, you’ll be equipped to assess the condition of your pads, recognize potential issues, and determine whether it’s time for a replacement. Ensuring your brake pads are in good condition will not only enhance your vehicle’s performance but also provide you with peace of mind while driving.
Gather Necessary Tools for Brake Pad Inspection
Before diving into your DIY brake pad inspection, it’s essential to gather the necessary tools to ensure the process is efficient and safe. Start with a sturdy floor jack and jack stands to lift your vehicle. This will allow you to access the wheels comfortably. Be sure to use wheel chocks to prevent any accidental movement while you’re working.
You will also need a lug wrench for removing the wheel nuts. Opt for a breaker bar if you encounter any stubborn lug nuts. Once the wheel is off, having a torque wrench will be crucial for re-installation to ensure the proper tightness according to manufacturer specifications.
Next, prepare to examine the pads thoroughly. A flashlight will help you see into tight spaces and assess wear and tear on the brake pads. A digital caliper can measure the thickness of the pads accurately, which is vital for determining whether they need replacement.
Don’t forget gloves and safety glasses to protect yourself while handling components that may contain brake dust, which can be harmful. Finally, a wire brush or scraper will help clean any debris or rust on the caliper or bracket, allowing for a clearer inspection of the pads.
Steps to Remove and Inspect Brake Pads
Before beginning any DIY brake maintenance, ensure you have the necessary tools and safety equipment. You will need a jack, jack stands, a lug wrench, a socket set, and a brake caliper tool.
- Park the Vehicle Safely:
Choose a level surface, engage the parking brake, and turn off the engine. It’s crucial to prevent the vehicle from rolling.
- Loosen the Wheel Lug Nuts:
Using the lug wrench, slightly loosen the lug nuts on the wheel where you will inspect the brake pads. Do not remove them completely at this stage.
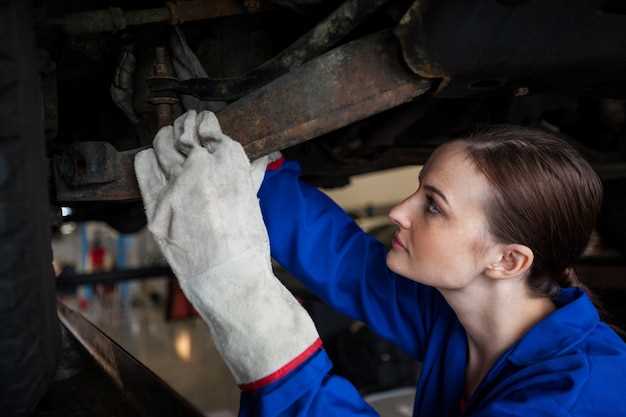
- Lift the Vehicle:
Position a jack under the vehicle’s recommended lifting point and raise it until the tire is off the ground. Secure the vehicle with jack stands for safety.
- Remove the Wheel:
Now, completely remove the lug nuts and take off the wheel to access the brake components.
- Remove the Brake Caliper:
Locate the caliper bolts and use the socket set to remove them. Carefully slide the caliper off the brake pads and hang it using a wire so it doesn’t hang from the brake line.
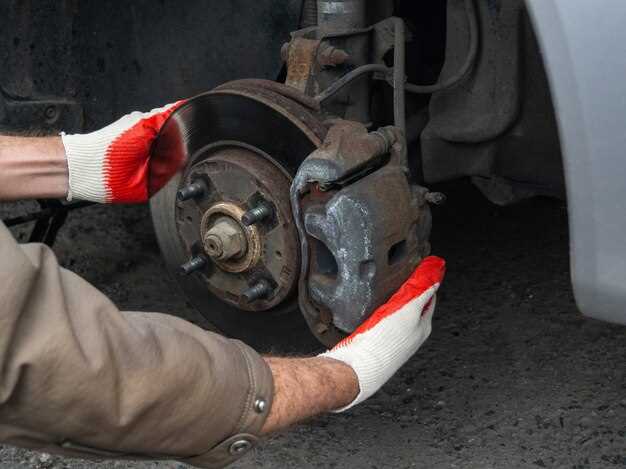
- Take Out the Brake Pads:
Remove the brake pads from the bracket. Inspect the pads for wear, checking the thickness. If they are less than 1/4 inch thick, consider replacing them.
- Inspect the Brake Rotor:
Check the rotor surface for scoring, grooves, or cracks. A smooth, even surface is essential for proper braking efficiency.
- Reassemble Components:
After inspection, if the pads and rotor are in good condition, reassemble the caliper and wheel. If replacement is needed, follow industry standards for reinstalling new brake pads.
- Lower the Vehicle:
Carefully remove the jack stands and lower the vehicle back to the ground. Tighten the lug nuts securely in a crisscross pattern.
- Test the Brakes:
Before hitting the road, pump the brake pedal a few times to ensure the pads set properly. Conduct a short test drive to verify brake performance.
By following these steps, you can safely and effectively remove and inspect your brake pads at home, ensuring your vehicle’s braking system functions optimally.
Recognizing Signs of Worn or Damaged Brake Pads
When it comes to ensuring your vehicle’s safety, understanding the condition of your brake pads is crucial. Worn or damaged brake pads can compromise your vehicle’s braking efficiency and increase the risk of accidents. Here are key indicators to look for when inspecting your brakes at home.
1. Squeaking or Screeching Noises: One of the most common signs of worn brake pads is a high-pitched squealing sound when the brakes are applied. Many brake pads are equipped with built-in wear indicators that emit this noise to alert you that it’s time for a diy replacement.
2. Grinding Sounds: If you hear a grinding noise, it may indicate that the brake pads have worn down completely, and the metal backing is contacting the rotor. This is a serious issue that requires immediate attention, as it can damage the rotors and lead to costly repairs.
3. Reduced Braking Performance: If you notice that your brakes are less responsive or require more effort to stop your vehicle, your brake pads may be worn. This can lead to increased stopping distances and should be addressed promptly for safety reasons.
4. Vibration or Pulsation: When applying the brakes, if you feel vibrations or pulsation through the brake pedal, this could suggest uneven wear of the brake pads or issues with the rotor. Inspecting your brake pads regularly can help identify these concerns early on.
5. Visual Inspection: Regularly check the thickness of the brake pads through the wheel openings. A pad thickness of less than 1/4 inch is typically considered worn and should be replaced soon. Look for any signs of cracks or significant wear as well.
Recognizing these signs early can help you maintain your vehicle’s braking system efficiently. If you’re experiencing any of these symptoms, it’s advisable to conduct a thorough inspection or consult a professional for further evaluation to ensure safe driving conditions.


